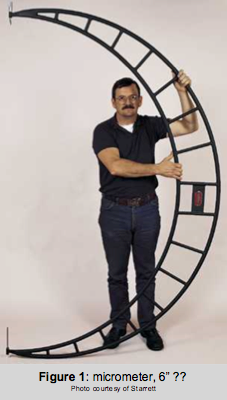
Another point to consider is that the certificate must clearly identify the instrument the data represents. That makes the header information (Manufacturer, Model, Description, Serial Number, ID Number, etc.) more important. In many cases, a picture of the instrument aids in understanding concepts that mere words cannot convey.
What if there is no model number on the instrument?
There are many instruments where either the manufacturer does not attach/inscribe a model number or where the model number has worn off or has been otherwise removed from the instrument. But that doesn’t mean a model number doesn’t exist. If the OEM is still in business, it should be relatively easy to determine the correct model number to assign to the instrument on the Cal certificate. If the OEM is no longer in business, then it is likely that this information can still be obtained from their documentation or, if the OEM was acquired by another company, they will likely be able to help determine the correct model number. However, there are cases where, after exhausting all possibilities, it is simply impossible to determine a model. That creates a precarious situation because the performance specifications (i.e., accuracy, linearity, repeatability, hysteresis, etc.) come from the OEM who designed the instrument. And these specs are associated with the model number of each instrument. Without the model, how can you determine the specs against which the instrument will be calibrated? While there are exceptions to a few instrument types that afford a way to get to the specs, for many others this is a real problem!
Examples of instruments that commonly experience this situation include: hand tools (e.g., plugs, rings, pins, micrometers, calipers, rulers, etc.), weights, gage blocks, pressure gauges, et.al. For these situations, if the Cal lab arbitrarily assigns tolerances to the calibration, what happens to your quality system if those aren’t the same as the tolerances you base your acceptance/rejection criteria upon? You’re losing control of your quality when caution is thrown to the wind like this. The correct step to take when no model (and therefore no specs) can be determined is for you, the equipment owner, to determine the tolerances that your process needs and use those to determine the acceptable tolerances of the instrument in question that will be applied to the calibration. Or, replace the “Unknown” instrument with another instrument that has a known model and performance specs, which eliminates the problem from your system.
If you choose to stick with the “Unknown” instrument, we will enter the model as “Unknown” (after exhausting all other avenues) and either calibrate to your requested specifications or provide a “Data Only” calibration where no tolerances are applied, whichever of these options you choose. We highly recommend avoiding a “Data Only” Cal because it contains no Statement of Compliance (In Tolerance or OOT) and places the burden back on you to watch for these exceptions amidst all of the Cal certs you receive so you can evaluate the Cal results each and every time you get it back in order to determine whether or not the instrument readings have drifted far enough to negatively impact the processes in which it had been used over its most recent Cal interval. Whew, that’s a lot of work to subject yourself to, considering everything else that’s on your plate! Help us to help you by getting this right the first time it’s serviced and then you won’t have to worry about it again.
This concept is what we call a ‘quality blind spot’ and these are just some of the things we think about at Transcat. If you’re using us to handle your Cals, you can rest assured that we’ve built precautions into our quality system to catch these problematic situations on your behalf. If your using one of our competitors, wondering whether they are perpetuating quality blind spots in your manufacturing or testing process is what may be keeping you up at night! Learn more about gaining a different business perspective as well as technical concepts related to measurement risk and other Metrology concepts by viewing other white papers on our website.


